

Ok, my craft room is exploding with crafting materials. That’s the biggest reason I decided to do this 30-Day crafting challenge. And today, I have a super easy craft that uses some of the supplies I have. It’s also super easy to do and looks great too. I am going to show you how easy it is to DIY a rope vase! This is SO much fun!
Affiliate Disclaimer: Some of the blog posts on my site will allow you to purchase different products and services online provided by other merchants and not myself. Some of the links that I post on my site are “affiliate links.” This means if you click on the link and purchase the item, I may receive an affiliate commission.* I am a participant in the Amazon Services LLC Associates Program, an affiliate advertising program designed to provide a means for me to earn a commission by linking to Amazon.com and affiliated sites. *Disclosed in accordance with the Federal Trade Commission’s 16 CFR, Part 255: “Guides Concerning the Use of Endorsements and Testimonials in Advertising.”
How To DIY a Rope Vase
Ok, I have to say, one of the main reasons I am doing this challenge is to clean out my craft room.

Yikes. What a mess! I have SO much stuff in my craft room! Can you see why I want to get a handle on this? I mean, don’t get me wrong, I love my craft room. And I love being in my craft room. But it can be a little frustrating to work on a project, and have to search for what I need to complete said craft.
So I thought it would be a good way for me to focus on the supplies I have and use them to make some new crafts and home decor pieces for my home. As well as make some pretty awesome videos for my YouTube channel. Which has changed, by the way!

I have a NEW YouTube channel! I am the DIY Diva! How appropriate for me! And since I’m a new channel, I am starting over, which is REALLY HARD. I forgot what it was like to be a new channel on YouTube. All of the perks of having thousands of subscribers is gone. I can’t even link to things I use in my videos to help people. Personally, I think that is dumb. But whatever, I’m new, and I have to bide my time until YouTube deems me ‘worthy’ to be accepted into their partner program. And I’m ok with that. But it is definitely a learning experience to go back to the beginning. No wonder I didn’t do this sooner. Oh well.
How to DIY a Rope Vase – Really
Ok, enough of the backstory. Let’s make a vase, shall we?

This vase is very simple to make. And you won’t need a lot of supplies to make this. Here is what you will need:
Supplies
- Cotton Rope
- Glue Gun (and glue sticks too!)
- Vase or Bowl
- Scissors
- Flowers
- Spanish Moss
And that’s it! Pretty simple right?
Making the Vase
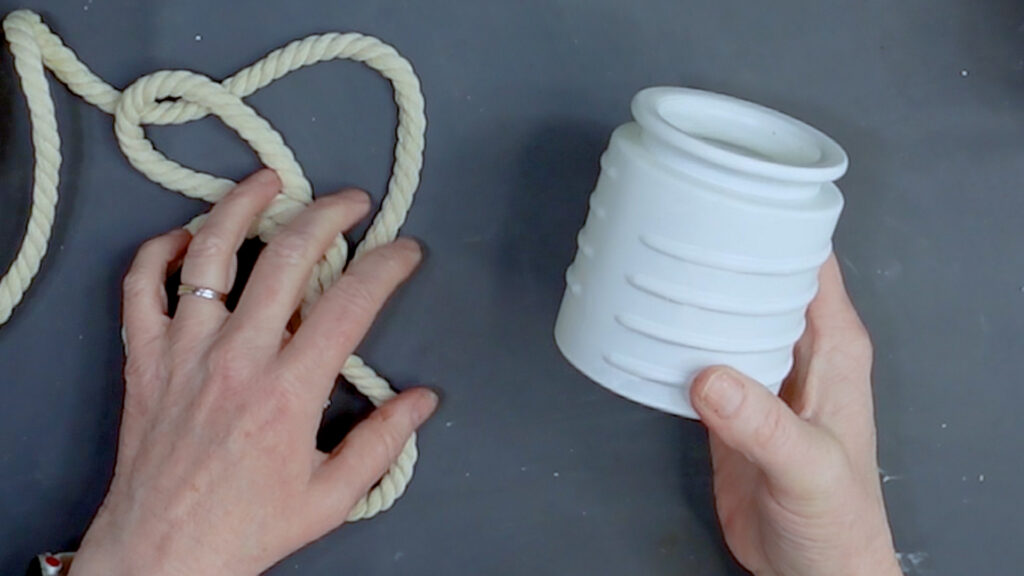
To make a rope vase, or bowl in this instance, all you do is glue the rope to the bowl. I turned my bowl upside down and started at the top.
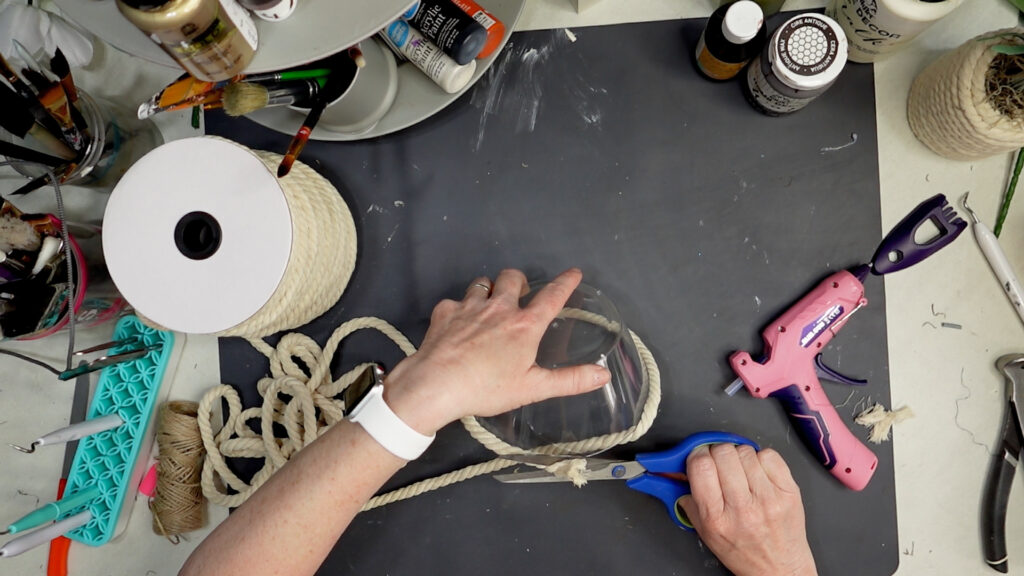
I found it much easier to have the rope be even as I secured it to the bowl be doing it this way. ANd then I just continued to coil the rope around the vase until I got to the bottom of the bowl.

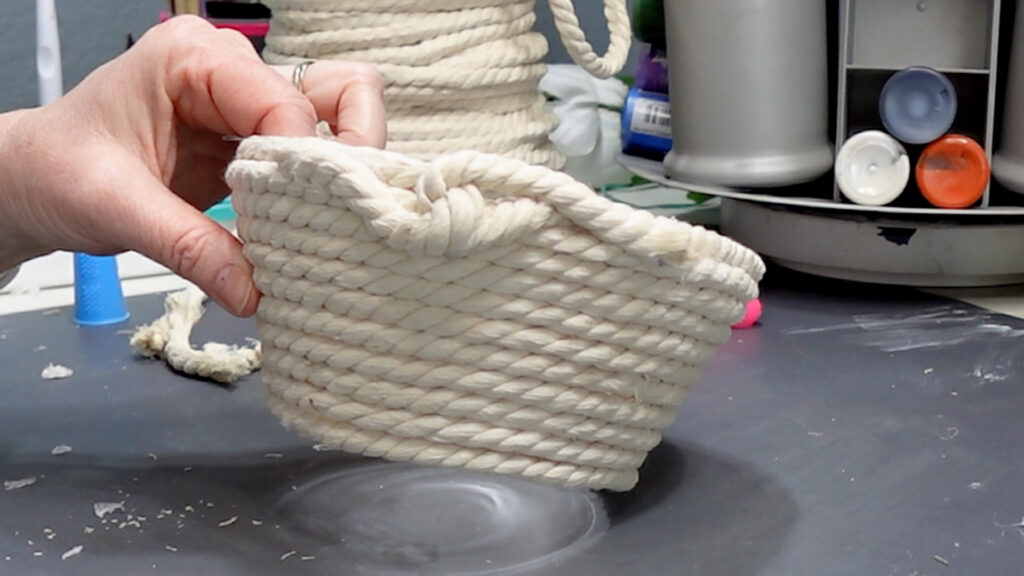
Then when I got to the top, I wrapped to turns of rope around the bowl so you wouldn’t be able to see the plastic. And I happened on a happy accident. I left the rope a little bit longer, and then entertwined the two pieces. Then secured them with glue.

And it made the bowl ‘look’ like this was done intentionally, but it wasn’t! How cool is that?!?
Adding in the Flowers
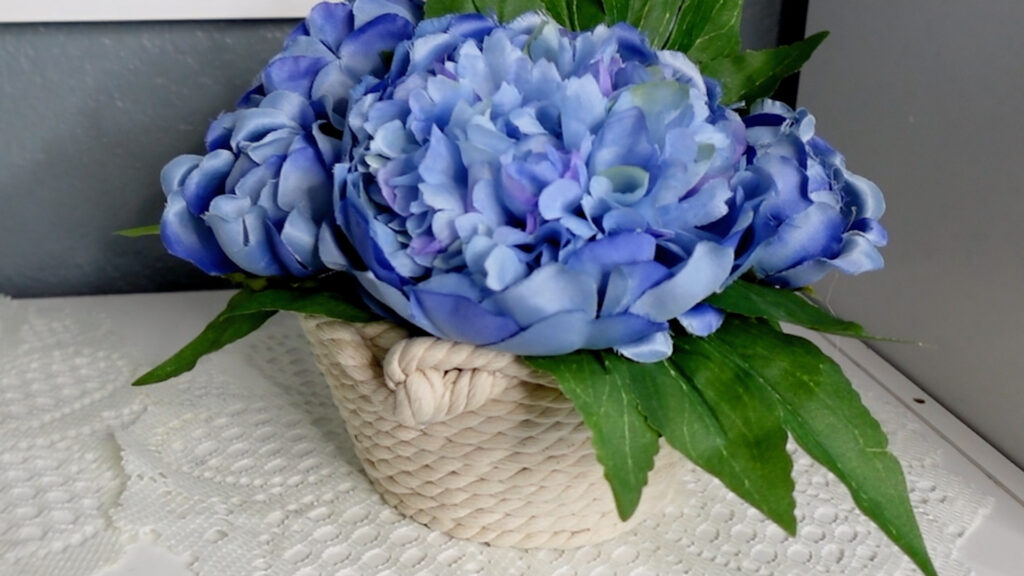
Next, I added in some faux flowers that I had in my stash, I just used a piece of floral foam, and secured that into the bowl. And then pushed the pretty blue flowers into the foam.
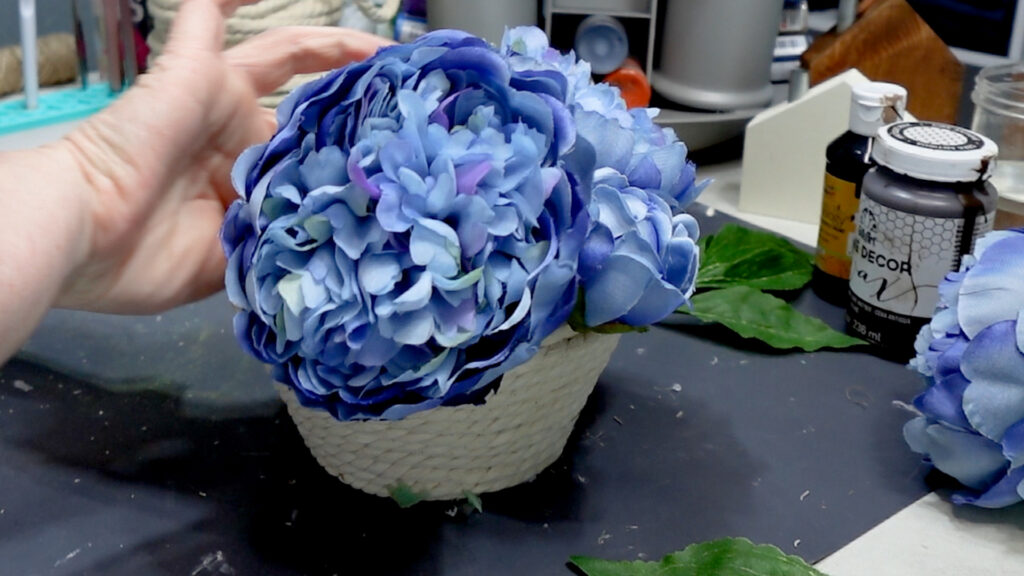
Pretty simple right? And then end result is simply stunning. I cannot believe that this was a plastic bowl that I got at Dollar Tree.
But the best part was how fast I was able to make this. It took me about 15 minutes from start to finish. Talk about a fast craft! I could totally see using something like this in home staging, or even as a gift. I started with a little bit of an easier vase first using a Dollar Tree jar, or votive holder? Honestly, I don’t know what this thing was originally. But it was taking up space in my craft room, so I used it.
And now I have 2 adorable rope vessels that I added in some flowers to finish the look. I was able to use some of my craft stash, and I got something really cool in the process.

These vases turned out better than I expected them too, and I am SO happy I decided to give this craft a try!
How To DIY a Rope Vase
And if yo uare a visual learner, I can help you out. I created a video of this craft, and you can click on the image below and watch the video.
And while you’re watching the video – would you be SO kind as to subscribe to my new channel? It’s called DIY Diva and by clicking on the highlighted name, you will be taken directly to my YouTube channel. If you would subscribe – I would be FOREVER grateful! (Insert air hug here)
30 Day Crafting Challenge
And I know I am a little bit behind with my postings, sorry about that. But fear not! The crafts are coming! I have so many different crafts for you to do as I work my way through my craft stash. And when I am finished, I am hoping that my craft room will be mostly empty. Ok, not empty, but certainly a lot less kaced than it is right now.
And then my craft room will truly be my happy place! Also, if you are feeling the need for more crafting time, I have 5 other projects ready for you in my 30-Day crafting challenge! If you would like an easy one, this DIY cardboard storage box is very easy to make. And it uses things I am pretty sure you have in your home right now.
Happy Crafting!
 Should You Shop On Temu? Is It Worth It?
Leave a Reply